


The Art Of Cleaning And Waxing Floor
Before starting, gather the needed supplies. You'll need a mop bucket with a wringer and two mops. One mop is for cleaning, one for waxing. The mop for cleaning is flat with a microfiber pad. You'll also need floor wax for your floor type. You'll also need a safety gear like gloves and a mask. Make sure, you have a well-ventilated space.
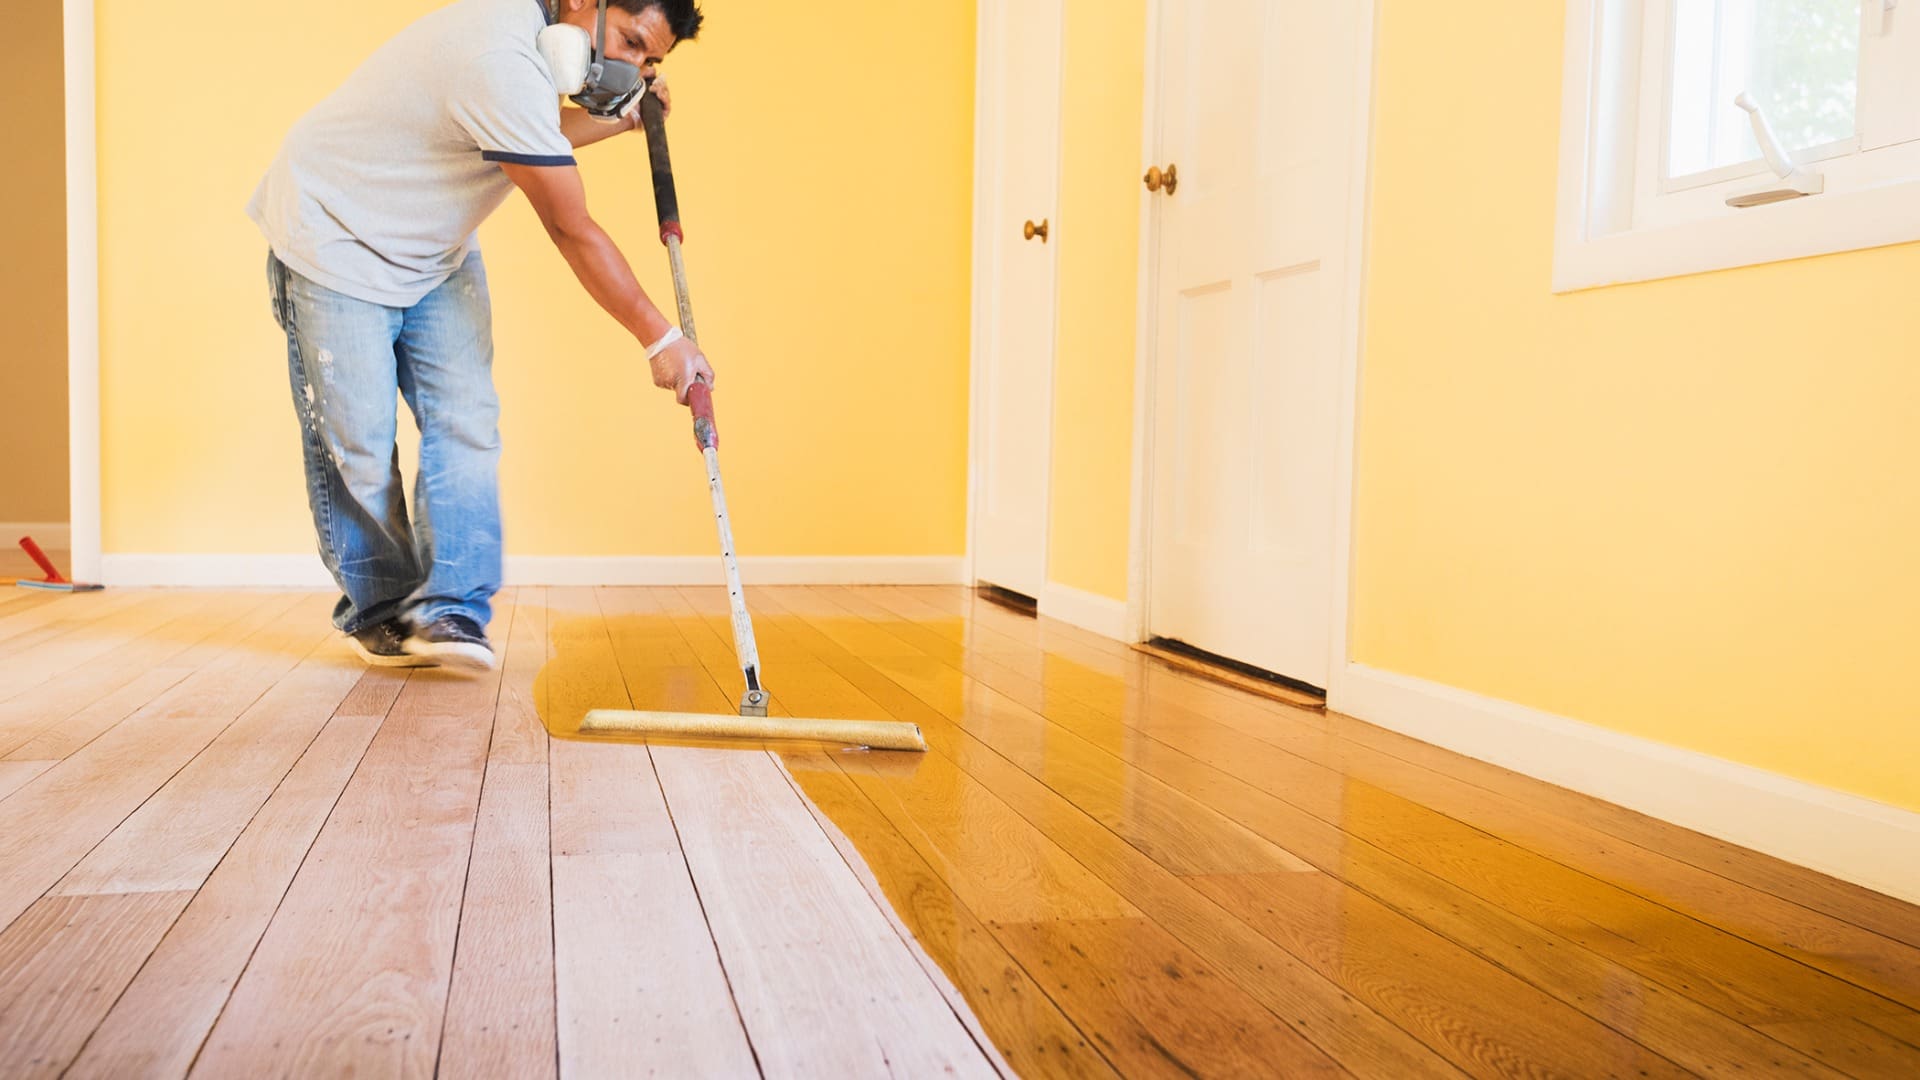
When applying the wax, protect surrounding areas using drop cloths or tape along baseboards. Follow the specific instructions for your wax product, ensuring the mop head is damp but not wet. Apply thin, even coats in a figure-eight pattern, working in sections from the farthest point to the exit to avoid walking on waxed areas.
Waxing Floors With Precision
Apply multiple thin coats rather than one thick coat for even drying and to prevent streaks. Allow each coat to dry completely before applying the next coat. Buff the floor with a clean, dry microfiber cloth after the final coat to add shine.
Dispose of wax and cleaning materials according to product instructions. Clean your tools by rinsing the mop bucket and mop head to remove any wax residue. Follow these steps to achieve a professionally waxed floor with a beautiful finish.
Easy Steps For Waxing Floors With A Mop
How to wax floors with a mop is a straightforward process that starts with making sure your floors are clean. Sweep or vacuum up any dirt or dust. Next, gather your supplies:
- One mop bucket
- Two mops (one for cleaning and one for applying wax)
- The right kind of floor wax.
- Make sure the area is well-ventilated to work in.
When you're ready to mop a waxed floor, protect the areas you don't want wax on with tape or drop cloths. Follow the instructions on your wax product. Make sure your mop isn't too wet—just damp enough. Apply the wax in smooth, overlapping strokes. Work in sections, starting farthest from the exit and moving backwards.
Remember, less is more when it comes to waxing. Apply thin coats and let each one dry completely before adding more. Once the wax is dry, you can buff the floor with a clean cloth for extra shine.
Floor Wax Applicator For Professionals’ Use
Floor wax applicator is an essential tool if you want to professionally apply wax to your floors. When choosing a floor wax applicator, consider the type of flooring you have and how big the area is that you're waxing. If you're new to waxing, it's best to start with something simple like a microfiber mop or a sponge mop.
A floor finish applicator helps you evenly spread the wax across your floor. For larger areas, you might prefer a Fas-Trak floor applicator with a wider coverage area. Make sure to follow the instructions on the wax product for the best results.
Using the right floor polish applicator ensures that your floors get a smooth, even finish. Here is a guide to choosing the right floor finish applicator. Take your time and work in small sections to avoid missing spots. With practice, you'll become more comfortable using various floor waxing tools. You'll also achieve professional-looking results.
Preparing The Floor
To mop a waxed floor, begin by clearing the area of furniture and obstacles. Use a broom or vacuum to thoroughly clean the floor, removing dirt, dust, and grime. Inspect the surface for any signs of damage like cracks or unevenness, and address these issues before proceeding. Gather coating equipment manufacturer and other cleaning supplies. These include a mop and good floor wax. Prepare the wax according to the instructions provided. Dip the floor waxing applicator into the bucket, ensuring it's not overly wet. Start applying the wax from the farthest corner of the room and work your way toward the exit, using smooth strokes. Allow each layer to dry completely before applying another. Once finished, clean your tools and replace the furniture. Your waxed floor should now look shiny and rejuvenated!
Selecting The Wax
Floor waxing applicators and floor polish applicators are special tools. They are for applying wax to floors. One common type is a flat mop with a microfiber pad, which helps to spread the wax evenly. Before using a floor polish applicator, it's important to clean the floor thoroughly to remove dust and debris. This ensures that the wax adheres well and gives a smooth finish. Once the floor is clean and dry, start applying the wax from one corner of the room towards the exit using smooth, even strokes. Allow each coat of wax to dry completely before applying the next coat for the best results. Following these steps with the right floor waxing applicators will help you achieve a beautifully waxed floor.
Tools And Materials Required
Gather all the necessary supplies before you begin:
- One mop bucket
- Two mops (one for cleaning and one for applying wax)
- The right kind of floor wax.
- Make sure the area is well-ventilated for work.
Essential Tools For Waxing Floors
To get started, you’ll need a few important commercial cleaning products and tools. The right equipment ensures the job is done efficiently and safely, and for that, we'll turn to Fas-Trak, a trusted cleaning equipment manufacturer. Below is a list of must-have products that will help you in this task:
| Product Name | Description |
| Fas-Trak Ergonomic MicroMop System | An advanced mop system that allows even application of wax with minimal effort. |
| Fas-Trak Chemical Transfer System | Ensures safe and precise transfer of cleaning solutions, preventing spills. |
| Fas-Trak RotoMop Floor Care System | A motorized mop system designed for high-traffic areas and thorough cleaning. |
| Fas-Trak Touch-Free Hand Care Dispensers | Provides convenient access to hand sanitizers and cleaners during your work. |
| Fas-Trak Green Earth Technologies | A line of environmentally friendly cleaners and wax solutions. |
Using these tools will make sure you achieve that professional, polished finish with ease. Now that you have the right cleaning equipment, let’s dive into the waxing process step by step.
Fas-Trak's Cleaning Equipment: A Game Changer
Choosing the right cleaning equipment manufacturer is essential to getting great results. Fas-Trak’s products are designed to make floor maintenance simpler and more efficient. Their innovative designs, like the Fas-Trak RotoMop Floor Care System and the Fas-Trak Ergonomic MicroMop, provide both high performance and ease of use, even in large industrial or commercial settings. By using their top-of-the-line industrial cleaning equipment, you’ll be able to achieve a flawless, professional finish every time.
Step-By-Step Guide To Waxing With A Mop
- Apply the Wax: Pour a small amount of wax onto the floor and spread it evenly using the floor finish applicator.
- Work in Sections: Divide the floor into manageable sections and apply wax in a consistent back-and-forth motion.
- Buff for Shine: Once the entire floor is waxed, use a floor polish applicator to buff the surface to a brilliant shine.
Drying And Curing
How to mop a waxed floor After applying the wax, allow it to dry as directed on the product label. Make sure the room has good airflow to help the wax dry.
Once the wax is fully dry, you can start mopping. Use a clean mop and a bucket of warm water. Avoid using too much water, as this can dissolve the wax.
Gently mop the floor in small sections, moving from one end to the other. Rinse the mop frequently to keep it clean and effective.
After mopping, let the floor air dry completely before walking on it to prevent any smudges or marks.
Post-Waxing Care
Once the wax is dry and settled, keep your floors looking nice by cleaning them regularly with a damp mop and mild soap. Every now and then, gently buff the surface to bring back its shine. These simple steps will help your floors stay beautiful and protected over time.
How Often Should I Wax My Floors?
How often you wax your floors depends on how much they get walked on. Usually, it's best to wax busy areas every 3 to 6 months. This keeps them looking nice and protects them from wear and tear. So, pay attention to how much your floors are used and give them a wax when needed.
Can I Use Homemade Wax?
Floor wax applicators come in various types, like mops or microfiber pads. They help spread wax evenly. Floor polish applicators are similar and used for applying floor polish. It's important to choose the right one for your floor type.
Using homemade wax can work, but it might not be as strong as store-bought wax. Try it out in a small spot first to see if it's okay for your floor.
Is Floor Waxing Safe For Pets?
Floor wax applicators come in various types, like mops with microfiber pads. These are perfect for applying floor wax evenly. Make sure to follow the product instructions carefully.
After the wax dries completely, you can safely let your pets walk on the floor. Remember to read the labels to be sure.
What Is The Difference Between Waxing And Polishing?
When you wax a floor, you're putting on a protective coating that keeps it safe from scratches and spills. It's giving your floor a shield to protect it.
Polishing the floor makes it shiny and smooth. When you combine waxing and polishing, you get a floor that's not only protected but also looks really good. So, waxing and polishing work together to make your floor the best it can be!
A Guide To Using Floor Applicators For Waxing And Polishing
Using a floor wax applicator to wax your floors is a satisfying job that can make your space look amazing. Follow these steps and use the correct tools, like a floor finish applicator. You can make your floors look as good as new without spending much.
When you use a floor polish applicator, it's like giving your floors a special treatment that makes them shiny and smooth. The floor waxing applicator helps you apply the wax evenly so that your floors stay protected and beautiful.
By using a floor poly applicator, you can enhance the durability of your floors and protect them from damage. With these tools and techniques, you'll have floors that not only look great but also last longer. Get ready to enjoy the beauty and strength of your newly waxed and polished floors!
